Account Support Documentation
Hello members and welcome to the new AVSAB website! We hope you enjoy it and use it to deepen your understanding of Animal Behavior.
Please take a moment to verify the accuracy of your account on the new website and make updates based on the steps below. If you have any questions or issues, please fill out our support request form.
Index
To jump to any section of this page, click on a link below:
- Section 1: Verify your account
- Section 2: Updating Your Information
- Section 3: Create your public listing
- Section 4: Renewing your account
Section 1: Verify Your Account
Step 1 – Login to the website
The first step to verify your account is to login to the new website using your username (you can also use the email account that was associated with your account) and password. You can do so by clicking here, or clicking on the yellow login link at the top right corner of this page.
If your account exists in the new system, you will be taken to your new member profile. You can move on to step 2.
If you are unable to login you’ll need to determine whether it’s a password issue, or your account is not in our new system. You can do this by returning to the login page and clicking on the “lost your password?” link under the login form. Enter your username or email address in the form and click “Get New Password.”
What happens next is important:
If the next page says “Check your email for the confirmation link,” that means you’re in the system and all you need to do to is read the reset password email that was mailed to you and update your password based on the instructions. You should then be able to log into the new website.
If you get the following message “ERROR: There is no user registered with that email address” then there are two possibilities:
- You entered the wrong username or email address that’s associated with your account. Please check your records to make sure your using the correct username or email address. If you think you might have used a different username or email address than the one you entered, please try again.
- Your account got lost in the transfer to the new site. If you believe this is the case, please fill out our member support form and we will work to resolve the issue as soon as possible.
Step 2 – Verify Your Account Information
The next step is to verify the accuracy of your account, including your expiration date and more.
To view your account information, click on the “my account” button in the top right corner of the website (you must be logged in to see this button), or you can click here.
This will take you to your “my account” page, which contains all of the information about your membership, including your level, amount per year, and your expiration date or renewal date (if you have automatic renewal set up). Please check this date to make sure that it matches your records.
If you believe you have the wrong expiration or renewal date in our system, fill our our support form and we will work to resolve the issue.
Below you will see your account information, including your name, status, username, and email associated with the account. Please make sure this information is accurate.
**Note about the “Past Invoices” section on your account page: The date in this section reflects the date that your account was transferred from our old website to the new one and not the original date of purchase. We apologize for this inconvenience. When your account renews, you will see an accurate transaction date for your purchase or renewal in this section.
Section 2: Update Your Information
The new website has lots of new enhancements and features. To get the most out of your account, we suggest that you take a few minutes to update your information so that it is optimized for the new website. Here’s how to do it:
How to update your profile photo
Click on the “my profile” link at the top right of the page (this link only shows up if you’re logged in). From there, you will see a round photo with a user icon. That’s where your profile photo will eventually go.
To update your profile photo, scroll down the page until you see the link to “change profile photo.” Click on that link.
 You have the option of uploading a photo or taking a photo from your computer or mobile device if it’s able to do so.
To upload a photo: simply drag your new profile photo onto the green area of this page, or click the “select your File” button to select a specific file from your device. You will then be given the option to crop the photo to your liking.
To take a new photo: click on the “take photo” tab and then hit capture to take your photo. Click “save” to save your changes.
How to update your cover image
From the “my profile” page, click the “change cover image” link. We suggest you use an image that’s horizontally oriented an at least 1400 px and 440px tall wide. If you’re looking for a place to find a beautiful and free cover photo, we recommend unsplash.

**You can also update your cover image by clicking on the small icon on the top left of your cover photo on your “my profile” page
To upload a photo: simply drag it onto the green area of this page, or click the “select your File” button to select a specific file from your device. The option to crop your cover image is not available, so please double check and make sure it looks how you intended.
Update your profile:
*Please note: The information in your profile is available to other AVSAB members only and is not for the public at large. We suggest filling out the fields as completely as you can.
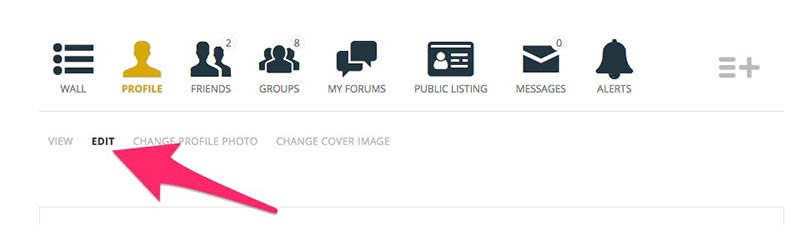
Click on the “my profile” link and then click the “edit” sub menu item.
 General Info:
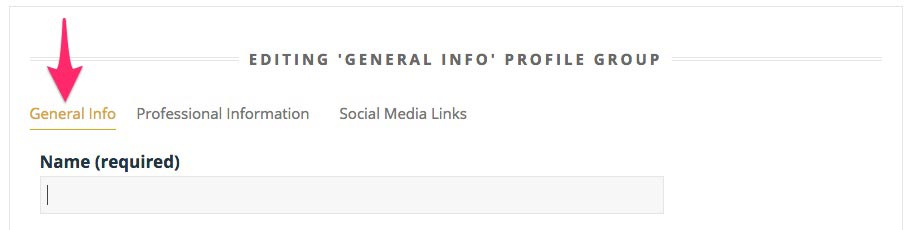
The first is the “General Info” tab, which contains fields for name, country, state or province, city, etc. Please update all of these fields so that the information in them is complete and accurate.
**The “Introduction” field is a chance for you to introduce yourself to the community, provide background information, and any other personal or professional information you’d like to share with other AVSAB members.
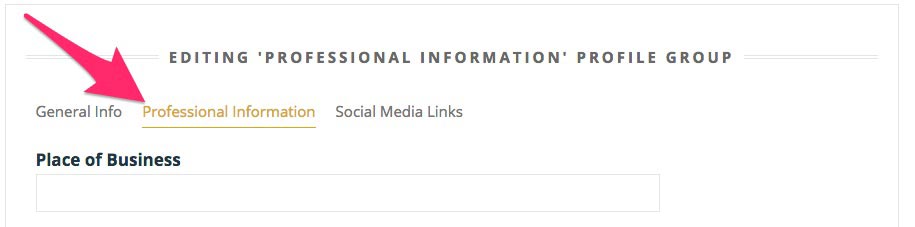
Professional Information (Or Student Information):
The second tab you need to edit is the “professional Information” tab (or it will be labeled “Student Information” if you have the student membership level.
Please fill out all or as many of the fields as you can.
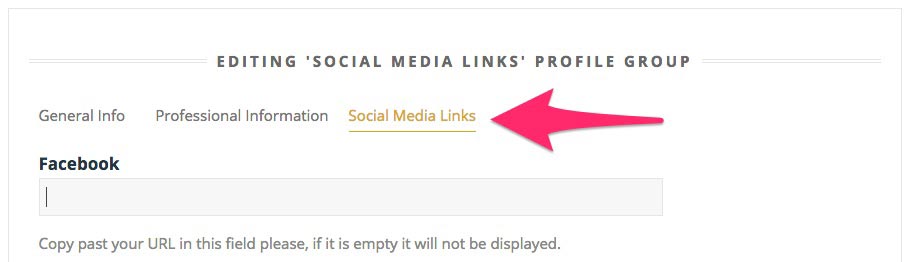
Social Media Links:
The third set of member information for you to update can be found under the “Social Media Links” section. This allows you to post links directly to any active social media accounts, including Facebook, Twitter, Linkedin, Google+ and Instagram. This is a great way to allow other members to know where you are active and provide links to your accounts so they can follow you.
To get the links from your accounts, navigate to the homepage of your social media accounts and copy and past the URL from the browser into the fields on the website.
Stection 3: Create Your Public Listing
The new AVSAB website features a public directory of animal behavior consultants. Think of it as a searchable database that the public can use to find animal behavior consultants to contact. It’s like Yelp but for behaviorists.
This directory is completely optional, and it is up to you whether or not you would like to be listed. The benefits of listing yourself or your business in this directory are it will make you visible to the public on our website, and also visible for the public at large through search engines like Google, Yahoo, Bing, etc. We highly recommend adding your listing if you want to be found by the public for your behavior services.
**Please note: This directory is only available to Professional and Affiliate members. Student members are not permitted to add a listing to this directory.
To see an example of what the listing page will eventually look like, click here and here.
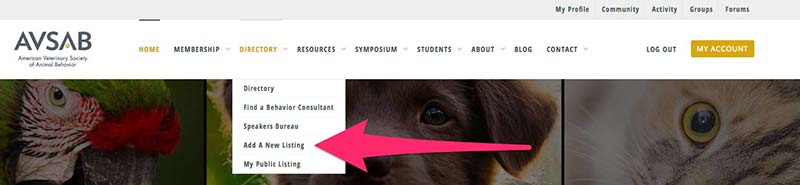
Adding Your Listing
You must be logged into the website to add your listing. If you need help logging in, click here. To add your public listing, hover over the directory link in the main navigation and select “Add a New Listing.”
This takes you to a page where you can add your listing information. Please be aware that you want to fill out these fields in a way that speaks to the public at large.
Directory Listing Tips:
- Name Field: Enter your full name, including titles in the name field.
- Introduction: the introduction field is your chance to really showcase yourself and what you do, as it is the first thing a person will see when they review your listing. We suggest including background information, listing the kinds of services you offer, and anything else you want.
- Categories: The categories you select will determine what category pages you show up on in the directory. For an example, view our dog category page. You can select multiple categories, and we suggest selecting all of the animals that you do behavior work with. Also, you have the option to add yourself to our speakers bureau by adding the “Public Speakers” category, offer yourself as an expert witness in legal trials by selecting the “Legal Expert Witness” category, and make yourself available to the media by selecting the “Media Consultants” category.
- Address: As you type your address into the address field, you should see it a list of addresses pop up based on the information you enter. Be sure to select yours from the list so that the system knows the precise coordinates of your listing and you show up properly on the map. Once you do, double check your country, region, city, and zip code to make sure they are correct. Also, double check to make sure the the icon on the Google map is in the correct location.
- Videos: Videos are a great way to connect with the public. If you have any Youtube or Vimeo videos, you can copy and paste the URL in this field (one per line) and they will appear in your listing.
- Add Images: We recommend adding images that are horizontally oriented and at least 800px wide for the best results. These photos create a slideshow at the top of your listing that users can scroll through.
- Click Preview and Save to review the appearance of your listing. Then be sure to click the “Publish” button to make your listing live.
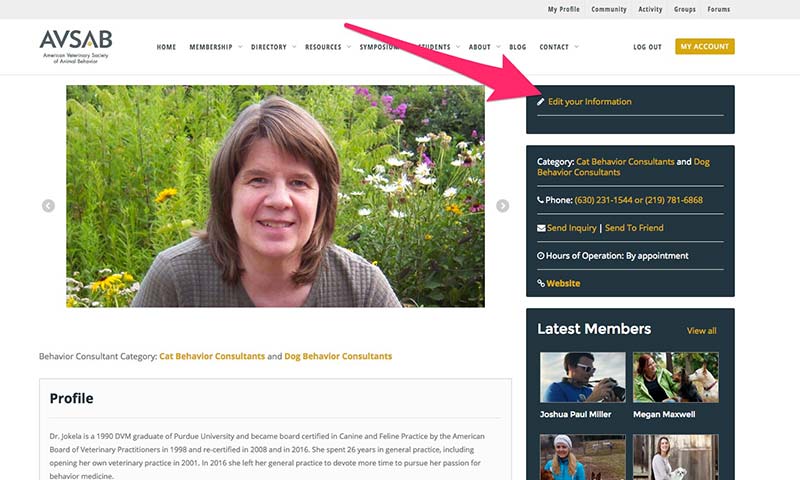
Editing Your Listing
You can edit your listing at anytime. First, you must be logged into the website to edit your listing. To log in, click here. Then, navigate to your listing (you can search for yourself from the main directory page to find it), or click on the “my profile” link at the top right of the page, then click on the “public listing” menu icon, and from the next screen click on your name.
In the top right of the sidebar on your listing page (or under directly under the listing on mobile) you will see the link to “edit your information.” Click on this, edit your information, and save your changes.
Renewing Your Membership:
Auto Renewing Members
If you selected the option to automatically renew each year when you checked out, your membership will simply renew on the renewal date. You can find your renewal date on your my account page.
You will also receive a renewal notice 7 days prior to the date that your card is charged.
If you need to update your credit card information (for example it was lost or expired), navigate to the my account page and click the link to update your payment information.
Non auto renewing members
You can renew your membership at any point in advance of your expiration date by clicking on the my account page and hitting the “renew” link.
Repurchase your membership if it has expired
If your need to repurchase your membership after your membership has expired, login to the website using your login name (or email address) and your password (If you don’t know your password, you can hit the “lost your password?” link on the login page).
Once you login you will be taken to the membership levels page, where you can click on your previous membership level. Your account information and your personal information should be autofilled by the system. All you need to enter to renew your membership is your payment details.
If you have any questions, or if you are having difficulty renewing, fill out our account support form.
Now Explore the Site and Start Connecting!
Now that you have your account properly set up, we suggest exploring some of the new features.
For a detailed description of all of the new features on the website, click here.
Or start connecting by:
- visiting our forums – be sure to subscribe to the forums your’e interested in
- browsing our member directory and making connections
- joining or creating groups
- posting an update for others to see